Syncing audio and video is important for good editing. In this guide, you will learn how to do it in Final Cut Pro. Final Cut Pro is a popular video editing software. It helps you create amazing videos. Let’s dive into the steps to sync audio and video.
Understanding Audio and Video Sync
Before we start, let’s talk about what audio and video sync means. When you watch a movie, the sound matches the action on screen. This is called sync. If the sound is not in sync, it feels strange. You might hear voices before you see mouths moving. This can confuse viewers.
Why Syncing Is Important
Syncing audio and video is important for several reasons:
- It keeps the story clear.
- It makes the video enjoyable to watch.
- It helps to show emotions better.
- It avoids confusion for the audience.
Tools You Need
To sync audio and video in Final Cut Pro, you need a few things:
- A Mac computer with Final Cut Pro installed.
- Your video footage.
- Your audio files.
Make sure all files are saved in one folder. This makes it easy to find them.
Steps to Sync Audio and Video
Now, let’s go through the steps to sync audio and video in Final Cut Pro.
Step 1: Open Final Cut Pro
First, open Final Cut Pro. Click on the app icon on your Mac. Wait for it to load. Once it is open, you will see a blank project or your previous projects.
Step 2: Create A New Project
If you want to start fresh, create a new project. Click on “File” in the top menu. Then choose “New” and “Project.” Give your project a name. Choose a location to save it. Click “OK.”
Step 3: Import Your Files
Next, import your video and audio files. Click on “File” again. Then select “Import” and “Media.” A window will pop up. Find the folder with your files. Select them and click “Import Selected.”
Step 4: Add Files To The Timeline
Now, add your video and audio files to the timeline. Drag your video file to the timeline at the bottom. Then, drag your audio file right below the video. Make sure they are in the right order.
Step 5: Find Sync Points
To sync the audio and video, you need to find sync points. Look for a point where you can see and hear something happening. For example, if someone claps, you can see the hands together and hear the clap.
Step 6: Align The Audio With The Video
Now, you will align the audio with the video. Zoom in on the timeline. Use the zoom tool at the bottom right. This helps you see the waves in the audio. Match the wave with the action in the video.
Step 7: Trim The Audio Or Video
If the audio is too long, you can trim it. Click on the end of the audio clip. Drag it to the left to make it shorter. You can also do this with the video. This helps to keep things neat.
Step 8: Play Back To Check Sync
After aligning, play back your project. Click the play button on the timeline. Watch the video carefully. Listen to the audio. Make sure they match. If they do not, go back and adjust.
Step 9: Use Automatic Syncing
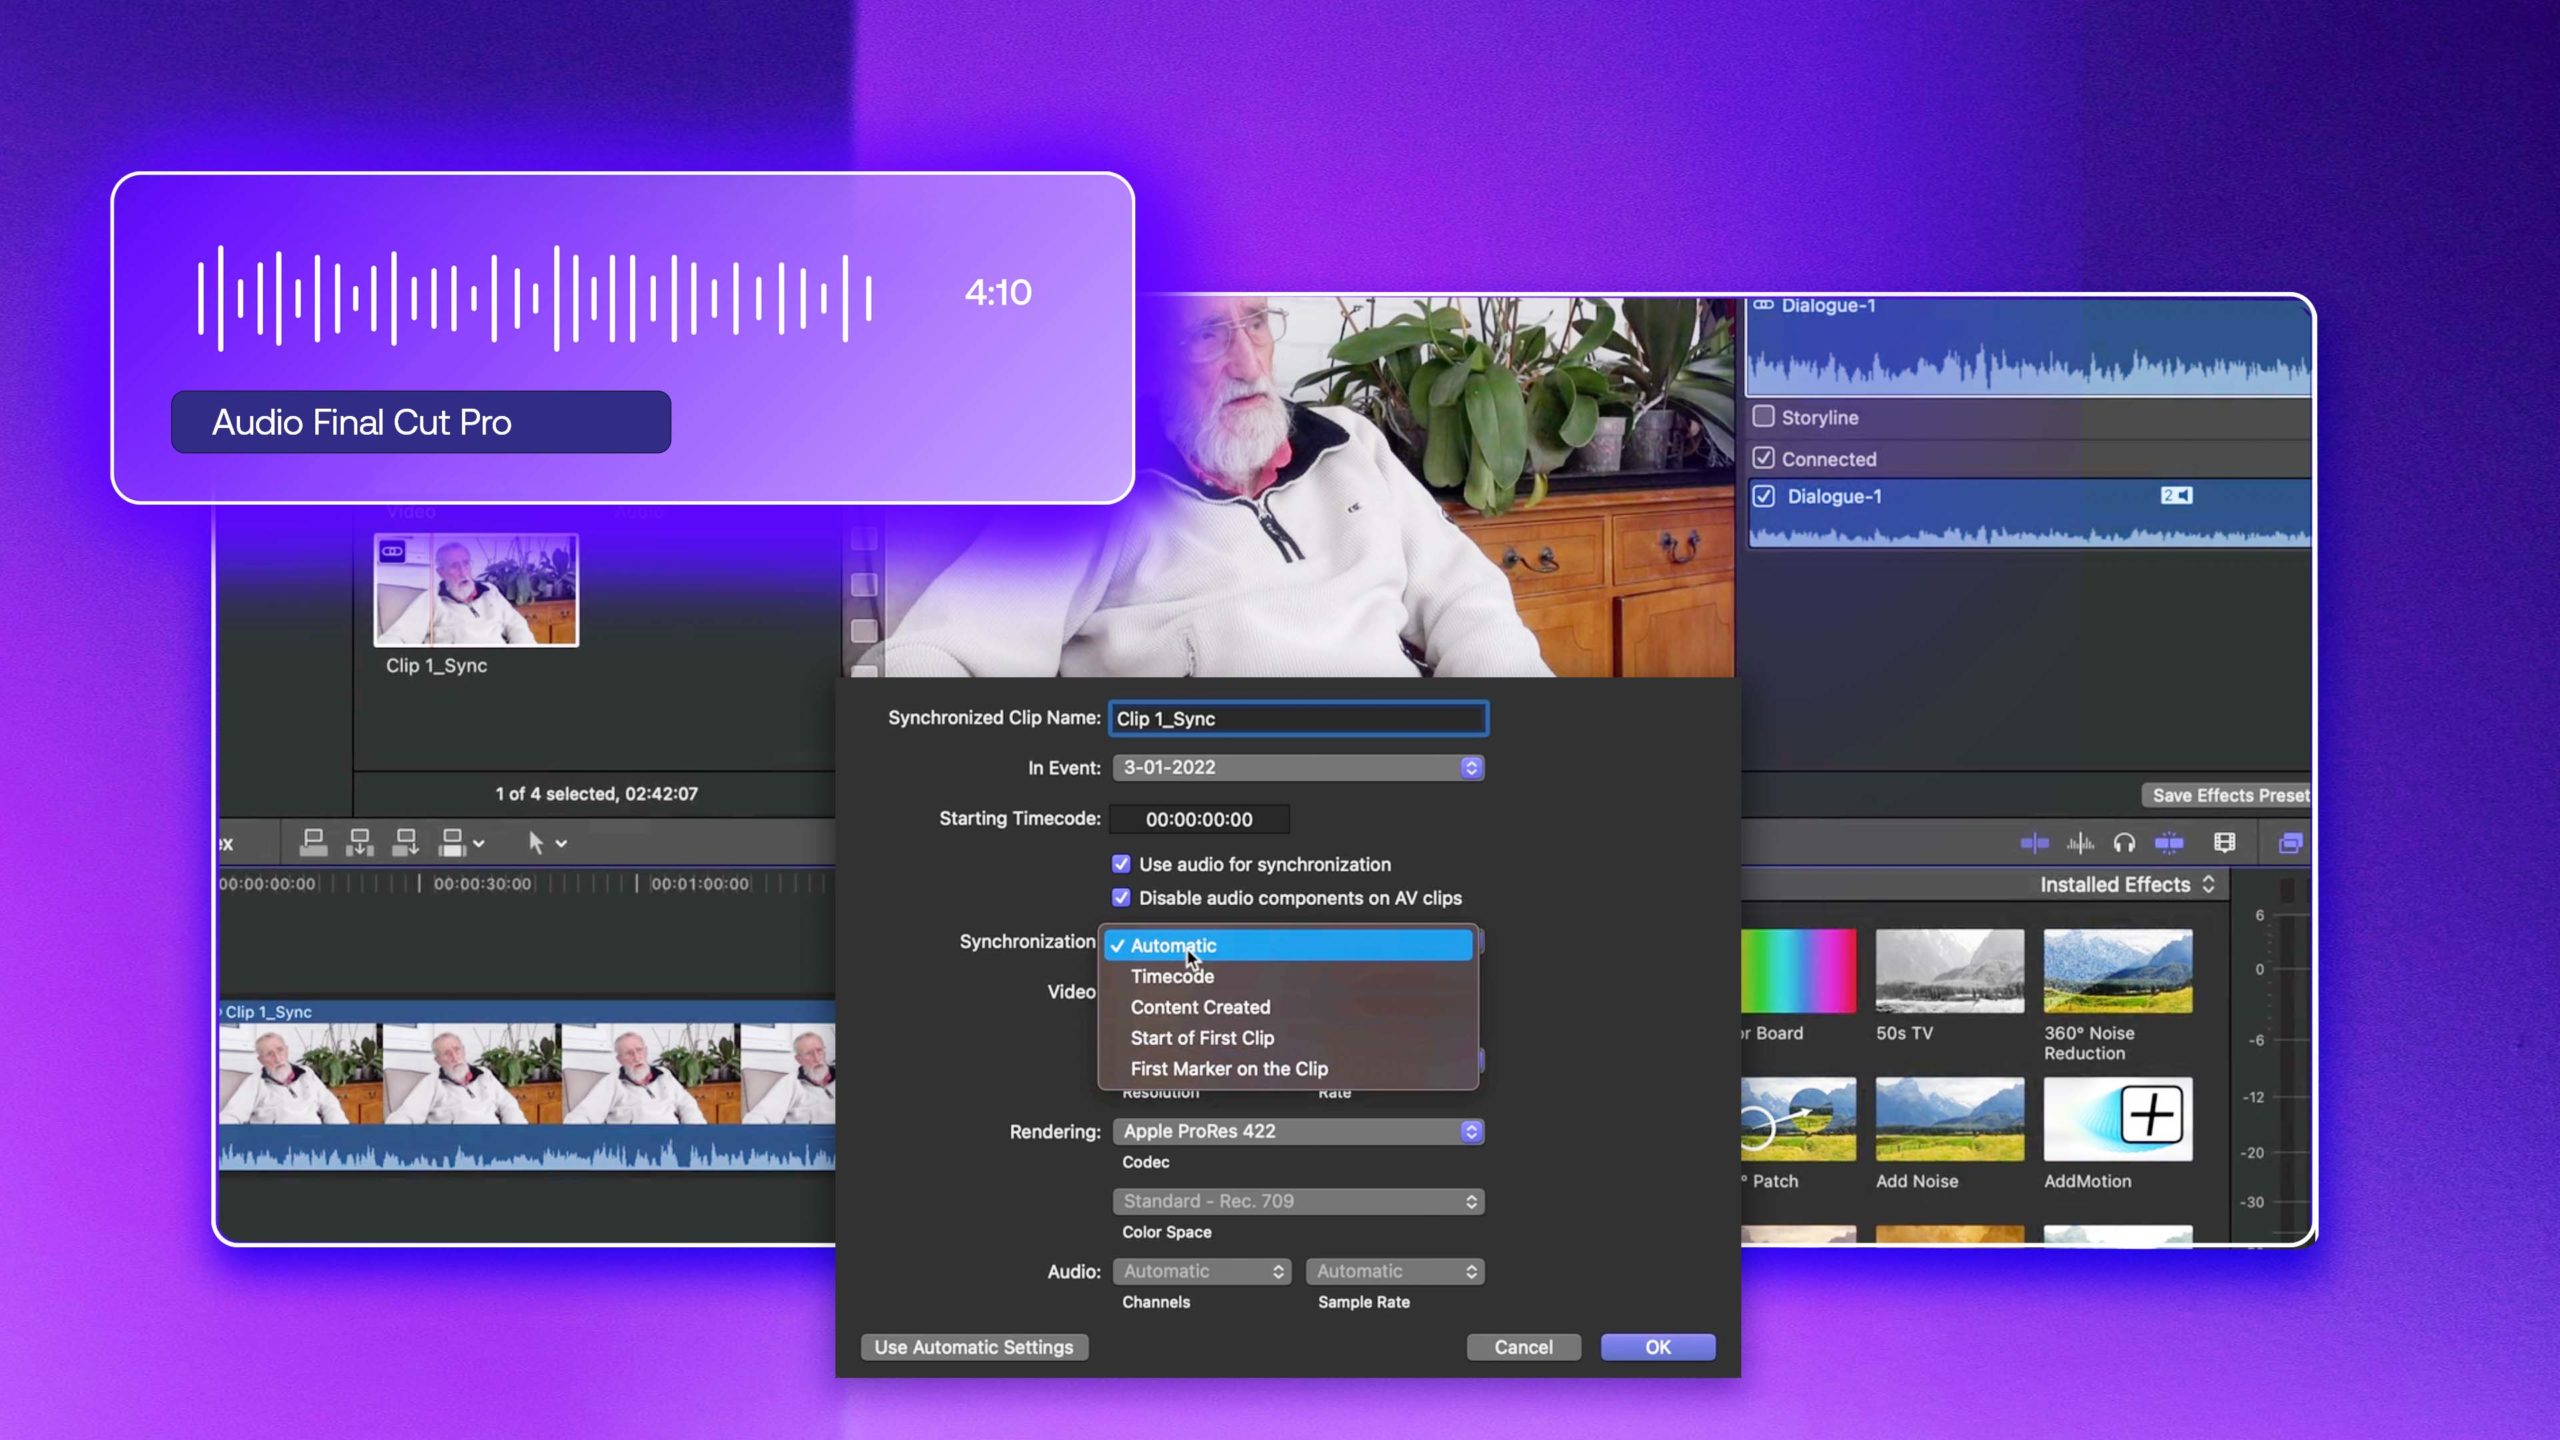
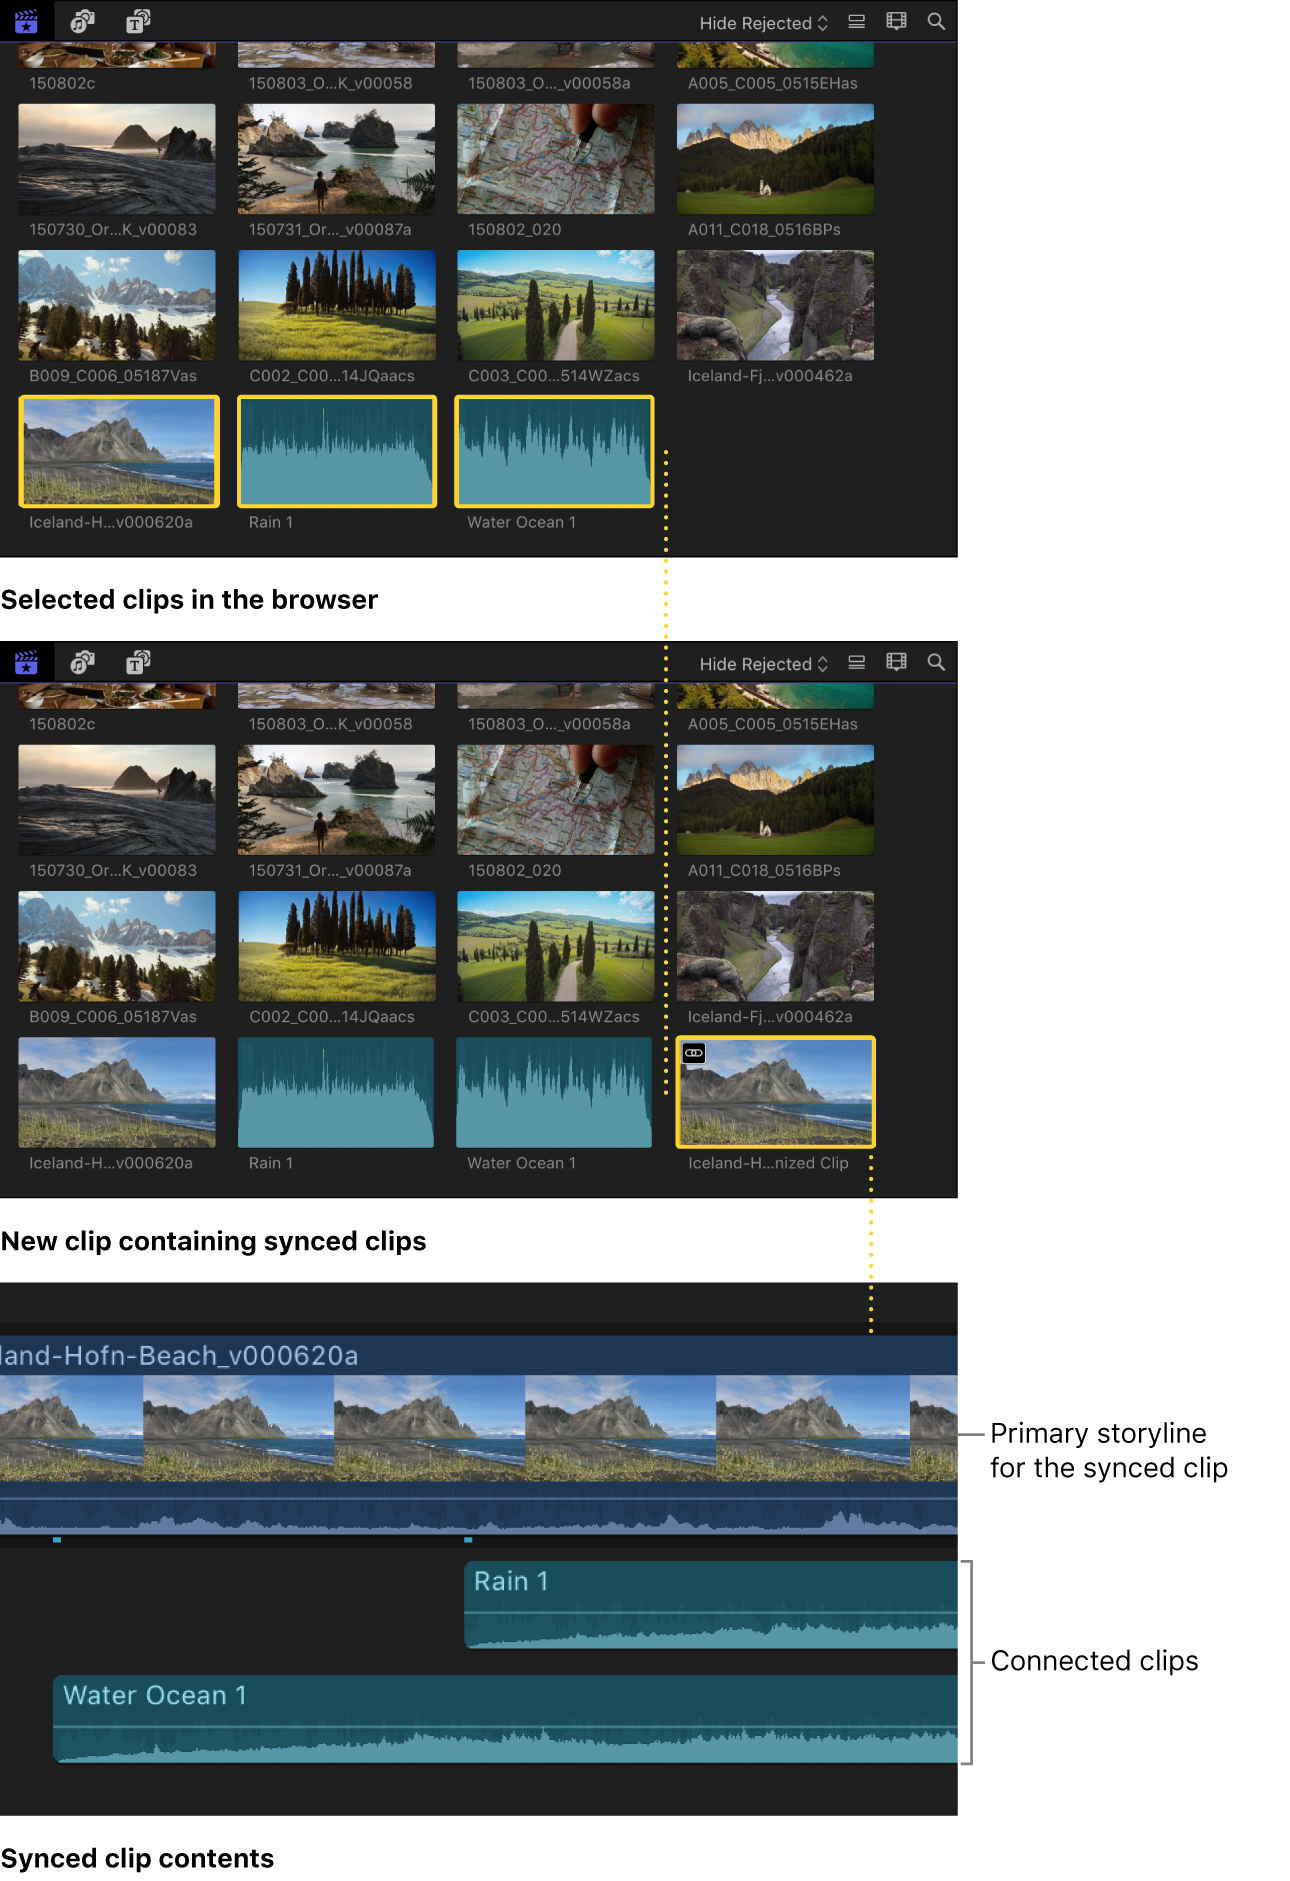
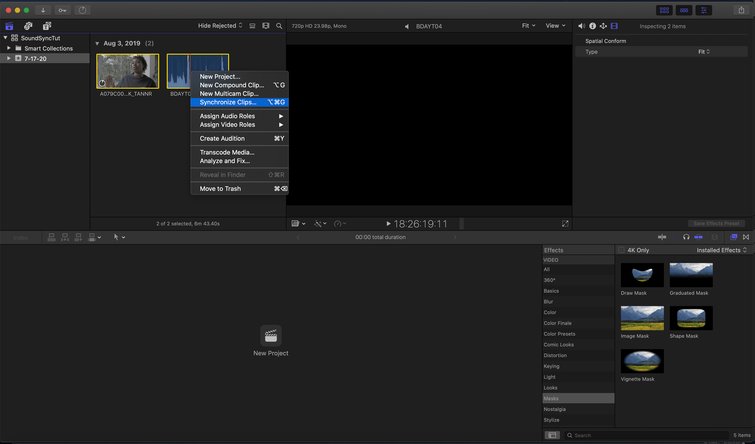
If you have many clips, you can use automatic syncing. Select both the audio and video clips. Right-click on them. Choose “Synchronize Clips.” Final Cut Pro will create a new clip that is synced.
Step 10: Save Your Project
After syncing, save your project. Click on “File” and then “Save.” This keeps your work safe. You can come back to it later.
Troubleshooting Common Issues
Sometimes, things do not go as planned. Here are some common issues and how to fix them:
Audio Is Still Out Of Sync
If your audio is still out of sync, check your sync points again. Make sure you matched the right actions. Zoom in more if needed.
Audio Is Too Loud Or Too Soft
If the audio is too loud or soft, adjust the volume. Click on the audio clip. A volume line appears. Drag it up to increase or down to decrease.
Video And Audio Are Not Aligned
If the video and audio are not aligned, use the move tool. Click and drag the audio clip left or right. Fine-tune it until it matches.

Credit: motionarray.com
Frequently Asked Questions
How Do I Sync Audio And Video In Final Cut Pro?
To sync audio and video in Final Cut Pro, select both clips. Then, right-click and choose “Synchronize Clips. “
What Is The Best Way To Sync Audio?
The best way is to use the “Synchronize Clips” feature. It aligns audio and video automatically.
Can I Sync Audio Manually In Final Cut Pro?
Yes, you can sync audio manually by dragging the audio clip to match the video.
Why Is My Audio Not Syncing Properly?
Audio might not sync if there’s a frame rate mismatch. Check your project settings for consistency.
Is There A Shortcut For Syncing Clips?
Yes, the shortcut is Command + Shift + S for synchronizing selected clips.
What Formats Does Final Cut Pro Support For Audio?
Final Cut Pro supports common formats like WAV, AIFF, and MP3 for audio files.
Can I Adjust Audio After Syncing?
Yes, you can adjust the synced audio by using the audio editing tools in the software.
Conclusion
Syncing audio and video in Final Cut Pro is easy. With these steps, you can do it well. Always check your work before finalizing. Good audio and video sync make your videos more enjoyable. Now you can create better videos with clear sound. Happy editing!

Credit: support.apple.com
Additional Tips
Here are some extra tips for better syncing:
- Use good quality audio for clearer sound.
- Record audio separately for better control.
- Practice syncing to improve your skills.
- Watch tutorials for more tips and tricks.
By following this guide, you can easily sync audio and video. Enjoy the process and keep creating!

